
Sticker Authenticity in an age of Reproductions
- 4x4ward

- Mar 1, 2021
- 5 min read
Even just a decade and a half ago, when we were first starting out making things, it was hard. I remember how proud I was when I put my first order for single color die cut stickers in to production. The minimum was high at 50, the cost was high, the artwork took a lot of work to get right as it required vector, something I was completely unfamiliar with.

Now, anything can be a sticker, just upload a flat image file. It can be cut to any shape or size and I see prices putting production at 10 pieces for $1, 25 for $20, 50 for $20. This isn't a bad thing, the ability to produce has put so many unique and fun designs in to the world. Making them for your friends, or to giveaway, these are all good things. But it begs the question, with how easily reproducible a sticker is, how do you verify authentic old stickers? How do you know what's real?

Thankfully, there are a few straightforward ways to tell, even if you're looking at one to buy online. These are the methods for sticker authenticity we use at 4X4WARD as well before offering them for sale. They're going to require a close eye, and a little primer on printing methods.
Up until the early 2000s, the most cost effective way to produce stickers in bulk was screen printing. For those unaware, screen printing dates back over 1,000 years. And while commonly used today for apparel, its foundation lives with print making. As the name implies, a screen is used to carry the ink and emulsion, blocking out areas in your design where you don't want color to appear. This makes it easily adaptable, to the point where it was even used on this set of mid 1990s OZ Rally wheels we recently imported.

Despite its versatility, due to setup fees and production time, it's been quickly replaced with inkjet die cut designs. Similar to how a home inkjet printer works, the large machines making these stickers add in a cutter. It can be mechanical, but even that has been replaced in many cases with a laser.
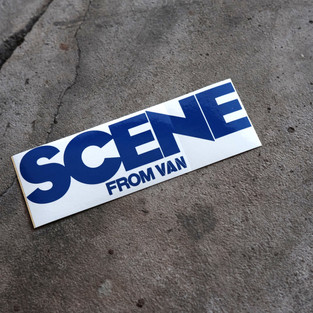
This inkjet and die cut method is how we product most of our stickers. And thankfully it's pretty easy to identify when this method is used, as it's a quick indicator that an older design is not authentic but instead a reproduction. So, other than the number one rule of trusting your gut, what are the tools to use?
1. Look at the shape.
This may seem straightforward, but complex sticker designs are a fairly recent development. Up until the early 2000s when computer assisted cutting first became available. Stickers were simple cuts. Ovals, circles, rectangles, etc being the most common. This isn't to say older stickers are exclusively simple shapes, but we call this one out first because it's the easiest to recognize even with a poor quality seller photo.


2. Question the colors and finish
Another method to use when high quality images aren't available is checking not just how many colors are represented, but what colors they are. With screen printed sticker designs, each color shown likely requires 1 additional screen. This means a 4 color sticker will have 4x the setup fees and prep work as a single color sticker. Most older sticker designs would lay one ink layer on a colored vinyl for cost savings.
These inks also weren't as easily variable in terms of color selection as inkjet printers are. While it's true you can make any screen printing ink in any PMS color, that again requires setup and the recipe to make the color you're choosing. Because of this, most colors stick to off the shelf options seen in this graphic from Kustom Imprints.

One other piece to look at is the finish of the sticker itself. Is it glossy or matte? While matte stickers dominate the market today, that wasn't always the case. Glossy stickers were much more common in the 80s and 90s. And while not as conclusive as some of the other things to look for, it is a useful guide to tell you if someone sent off old artwork to a printer.
3. The Back Matters too
Without a close in-person inspection, the shape and color are the primary indicators of an authentic sticker when looking at the design itself. But there's an important flip-side, literally. Look at the back, and specifically, the backing paper.
No matter how good paper production has gotten, the bleaches in it still fade, and the fibrous nature will attract dirt. These imperfections are common, even on properly stored, uncreased, and unused stickers.

4. Get Close
Easier said than done. And unfortunately if you're buying online it likely means you need to actually buy the sticker before you can see it this clearly. But once you do, you may notice a few things that will go a long way. We're going to call these out separately.
Combing
This is a byproduct of screen printing. Looking closely at edges can show what looks like pixelation, but is actually the mesh of the screen itself. Carefully sliding your finger across the design will allow you to feel the texture created by a screen printed design, not present on inkjet.

Overlap
Since each color screen is set up individually, it creates a natural order and layer set. This means there is likely to be a tiny bit of overlap between the colors that wouldn't be present on modern production methods where a JPG is uploaded.
In the example below, we see the black covering up the right side of the letters. This overlap will also be directional. As the ink is pulled, a little bit can get under the intended design area. This means overlaps will only happen in one direction on the sticker and it will be consistent across all stickers in that print run.

Colors
We talked about colors a bit already, but when viewing the sticker up close it becomes much more apparent of what's expected. With older print methods, an ink color was a consistent color. If you wanted red on the sticker, you used the red ink.
Compare this to inkjet methods today, where if you want red on the sticker you will get a combination of Magenta and Yellow inks mixed together and dotted. This is easily spotted when looking at this closeup of a 4X4WARD sticker we offer.

Imperfections
This should come as a no brainer, but like the backing paper, stuff happens to the front of the sticker. Pinholes in the ink, ink being marred or scratched, fading, it's all unfortunately but to be expected. And as most people know, aging is easy to fake, but hard to fake well (looking at you Pinterest shabby sheek fiends).

It's important to note these methods aren't conclusive. And as the adages go: buyer beware, and if it's too good to be true, it probably is. Where the boundaries lie for acceptable though is up to you as an individual. After all, these aren't wheels or parts that keep you from crashing in to a wall or careening off a trail. They're meant to be fun and decorative pieces that might not even end up on your car, since we know as well as anyone a binder filled with old cool stickers is just as valid a collection. But, if you are looking for the authentic stickers, we hope that they'll make you feel a little more confident about what to look for in sticker reproductions. We'd also be doing ourselves a disservice if we didn't plug our own sticker selection, where we validate each sticker before putting it up for sale so you know you're always getting an authentic in an age or reproductions.
Comments